Standing at Kea Point

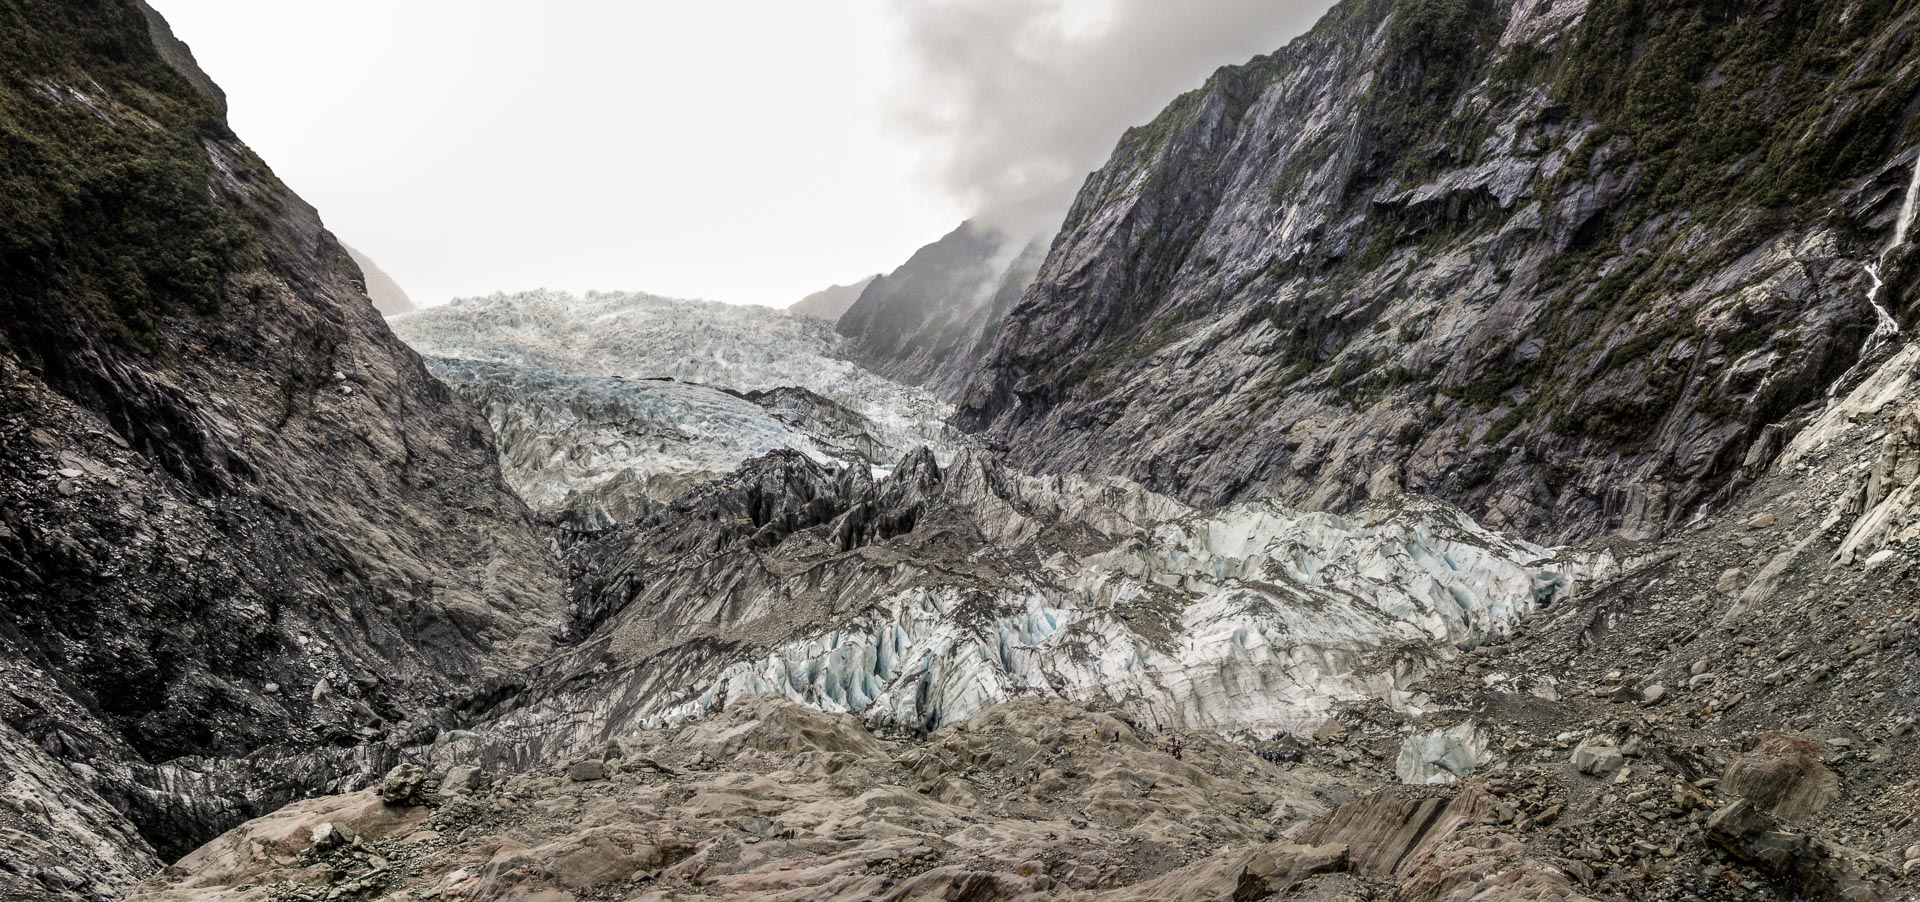
This image was taken at Kea Point. At about 100 years ago the Mueller Glacier reached way beyond this point. Today it’s only visible in the distance on the lefthand side (of the initial view).

Geotag Icon Show on map


Technique:
The shooting was done with a 2.60 meter (appx. 8.5 ft) pole to reach a more elevated viewpoint. The lens was mounted with a custom-made bracket. Stitched from five images taken with a Walimex (Samyang) 7.5mm fish eye lens on a Sony QX1. Four images around and an additional image for the nadir. The zenith was retouched by hand in post-processing.

Suspension bridge over Hooker River on the Hooker Valley Track

This image was taken on the first of the suspension bridges on the Hooker Valley Track. At about 100 years ago the Mueller Glacier reached approximately to this point. Today it’s only visible in the far distance behind the Mueller Lake.

Geotag Icon Show on map


Technique:
The shooting was done with a 2.60 meter (appx. 8.5 ft) pole to reach a more elevated viewpoint. The lens was mounted with a custom-made bracket. Stitched from five images taken with a Walimex (Samyang) 7.5mm fish eye lens on a Sony QX1. Four images around and an additional image for the nadir. The zenith was retouched by hand in post-processing.

Standing between boulders of Quantum Field near Castle Hill

The giant limestone boulders of Quantum Field are definitely worth a visit.

Geotag Icon Show on map


Technique:
The shooting was done with a 2.60 meter (appx. 8.5 ft) pole to reach a more elevated viewpoint. The lens was mounted with a custom-made bracket. Stitched from six images taken with a Walimex (Samyang) 7.5mm fish eye lens on a Sony QX1. Five images around and an additional image for the nadir. The zenith was retouched by hand in post-processing.

On a campground with a view

This campground offers some great views over Akaroa Harbour. You can get to Akaroa with a short walk down the hill.

Geotag Icon Show on map


Technique:
The shooting was done with a 2.60 meter (appx. 8.5 ft) pole to reach a more elevated viewpoint. The lens was mounted with a custom-made bracket. Stitched from five images taken with a Walimex (Samyang) 7.5mm fish eye lens on a Sony QX1. Four images around and an additional image for the nadir. The zenith was retouched by hand in post-processing.

View over Mount Cavendish Reserve

This image was taken near the summit of Mount Cavendish. You can see the upper station of the gondola. In the opposite direction you can see the city of Christchurch.

Geotag Icon Show on map


Technique:
The shooting was done with a 2.60 meter (appx. 8.5 ft) pole to reach a more elevated viewpoint. The lens was mounted with a custom-made bracket. Stitched from five images taken with a Walimex (Samyang) 7.5mm fish eye lens on a Sony QX1. Four images around and an additional image for the nadir. The zenith was retouched by hand in post-processing.

Re:Start Mall in Christchurch

This panrama was taken at the Re:Start Mall in Christchurch.

Geotag Icon Show on map


Technique:
The shooting was done with a 2.60 meter (appx. 8.5 ft) pole to reach a more elevated viewpoint. The lens was mounted with a custom-made bracket. Stitched from five images taken with a Walimex (Samyang) 7.5mm fish eye lens on a Sony QX1. Four images around and an additional image for the nadir. The zenith was retouched by hand in post-processing.

Panorama at Aratiatia Rapids

Despite the resolution of only 5 megapixels of one of the original images the stitched image has 55 megapixel due to its high number of source images. For this panorama I used 22 images in landscape orientation.

The Aratiatia Rapids are flooded every two hours from the dammed section of the Waikato river.

Aratiatia Rapids
Aratiatia Rapids

Geotag Icon Show on map

QR Code Business Card