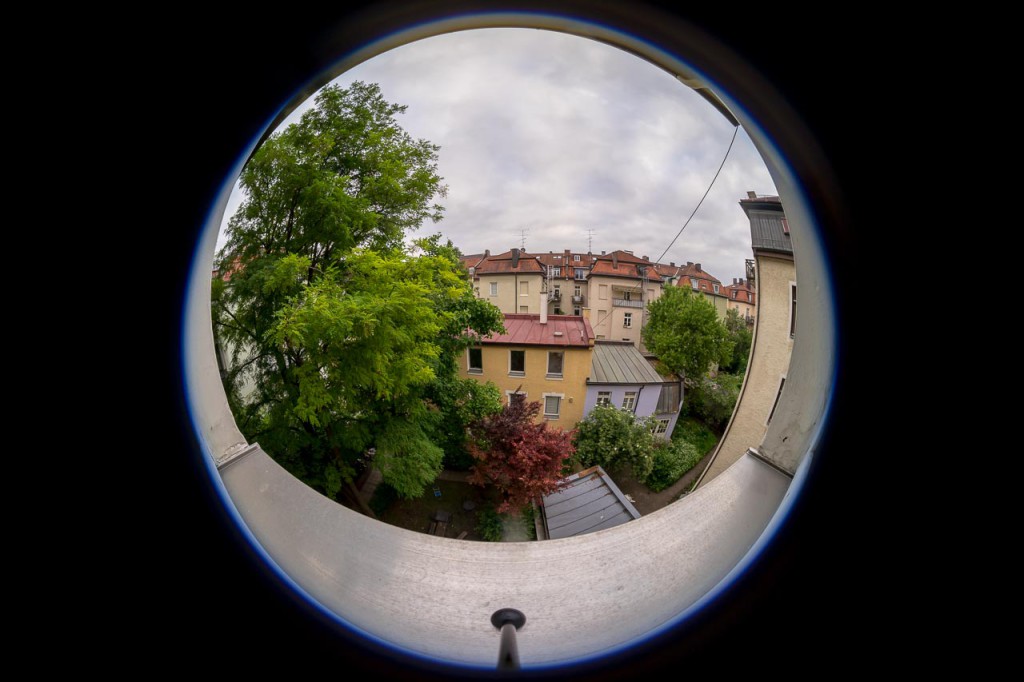
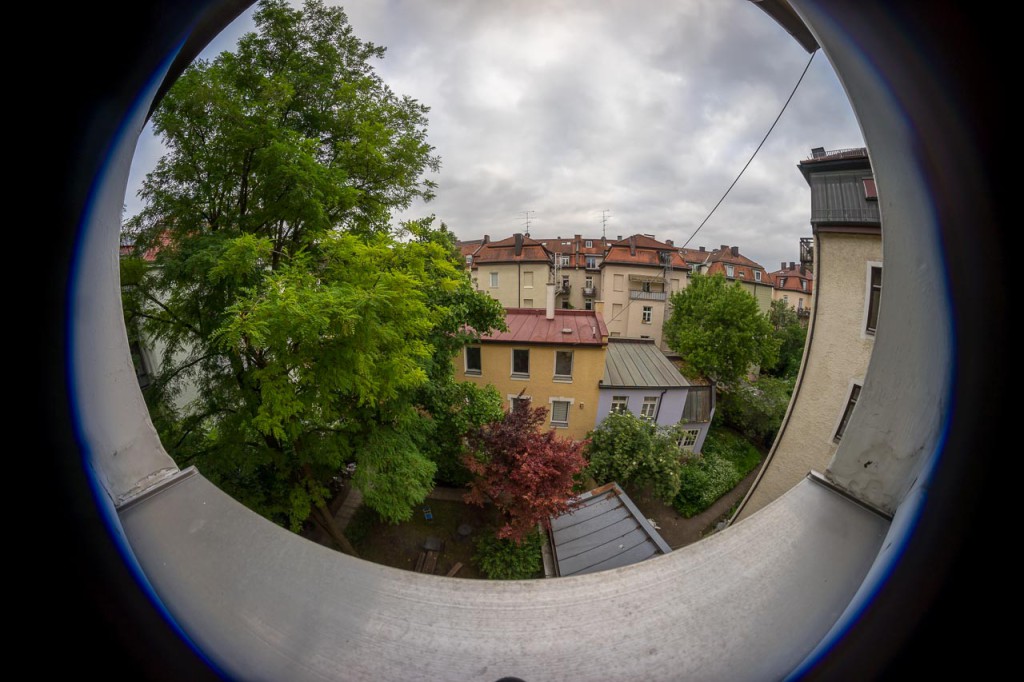
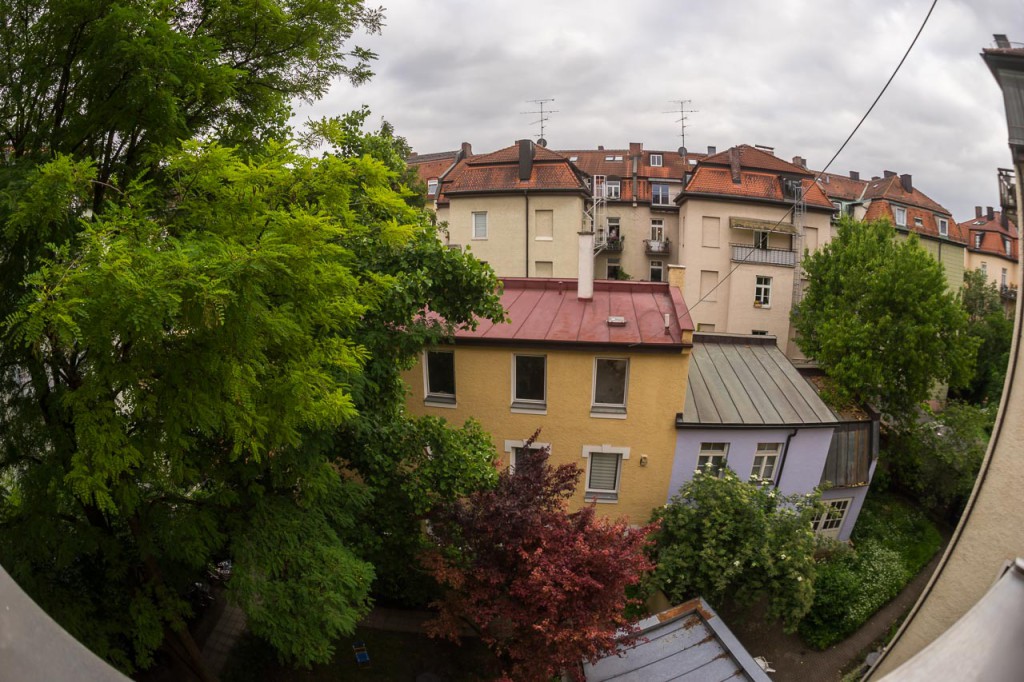
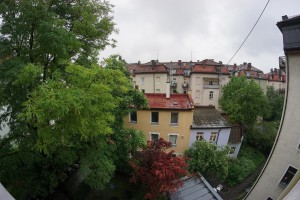
The following three images illustrate the three fish eye lenses on Sony cameras with a full frame size sensor (for example the Sony ILCE-7). To get these kind of images on a full frame sized sensor you have to shave the lenshood of the Samyang lenses.
Category: Technical
Technical stuff on panorama shooting and on photography in general.
Difference between Samyang 7.5mm and Samyang 8mm on an APS-C sensor camera
The following two images illustrate the two fish eye lenses on Sony cameras with an APS-C size sensor (for example the Sony ILCE-6000 or the Sony ILCE-QX1). To get these kind of images on an APS-C sized sensor you have to shave the lenshood of the Samyang 7.5mm.
Panorama setup with Sony ILCE-QX1 and Samyang 7.5/3.5 fisheye lens
In search of a small and lightweight spherical panorama setup I’ve seen a Walimex Pro 7.5/3.5 fisheye lens for micro 4/3 mounted via an adapter to a Sony camera with E-mount and APS-C sized sensor. The lens is originally manufactured under the name of Samyang 7.5mm F3.5 Fish-eye Lens and was also available under the name of Bower or Rokinon.
The problem however is, that it is not so easy to find an adapter to mount the lens to the Sony E-mount. I found one at Photokina at a Chinese booth and bought it. It did not fit perfectly, but reasonable enough to make it work after some tinkering around with some sandpaper. To be able to focus to infinity on my E-mount camera a distance ring in the lens had to be removed.
To get the most out of such an setup you also have to shave the lenshood. The effect is shown in another article.
A short while ago the Sony ILCE camera lineup was expanded with the Sony ILCE-QX1. Currently this is the smallest camera of the Sony ILCE camera lineup. As it has no viewfinder or monitor by itself, the settings and the heading are usually controlled with an app on a smartphone.
Before I purchased the camera as a base for a new panorama setup I checked that the camera meets the following requirements:
- Trigger via Sonys Multi-USB connector (works)
- Accept manual lenses without electrical contacts (works)
- Remember the last settings after the camera is turned on again (works)
- Capture in RAW (works, but you can’t disable the accompanying JPEG)
- Capture images local if no smartphone is connected via WLAN (works)
- Manual mode (can be simulated with shutter priority on the camera and a manual lens, because then the aperture can be set with the lens)
With these requirements fullfilled I purchased the camera and use it as a base for the following panorama setup:
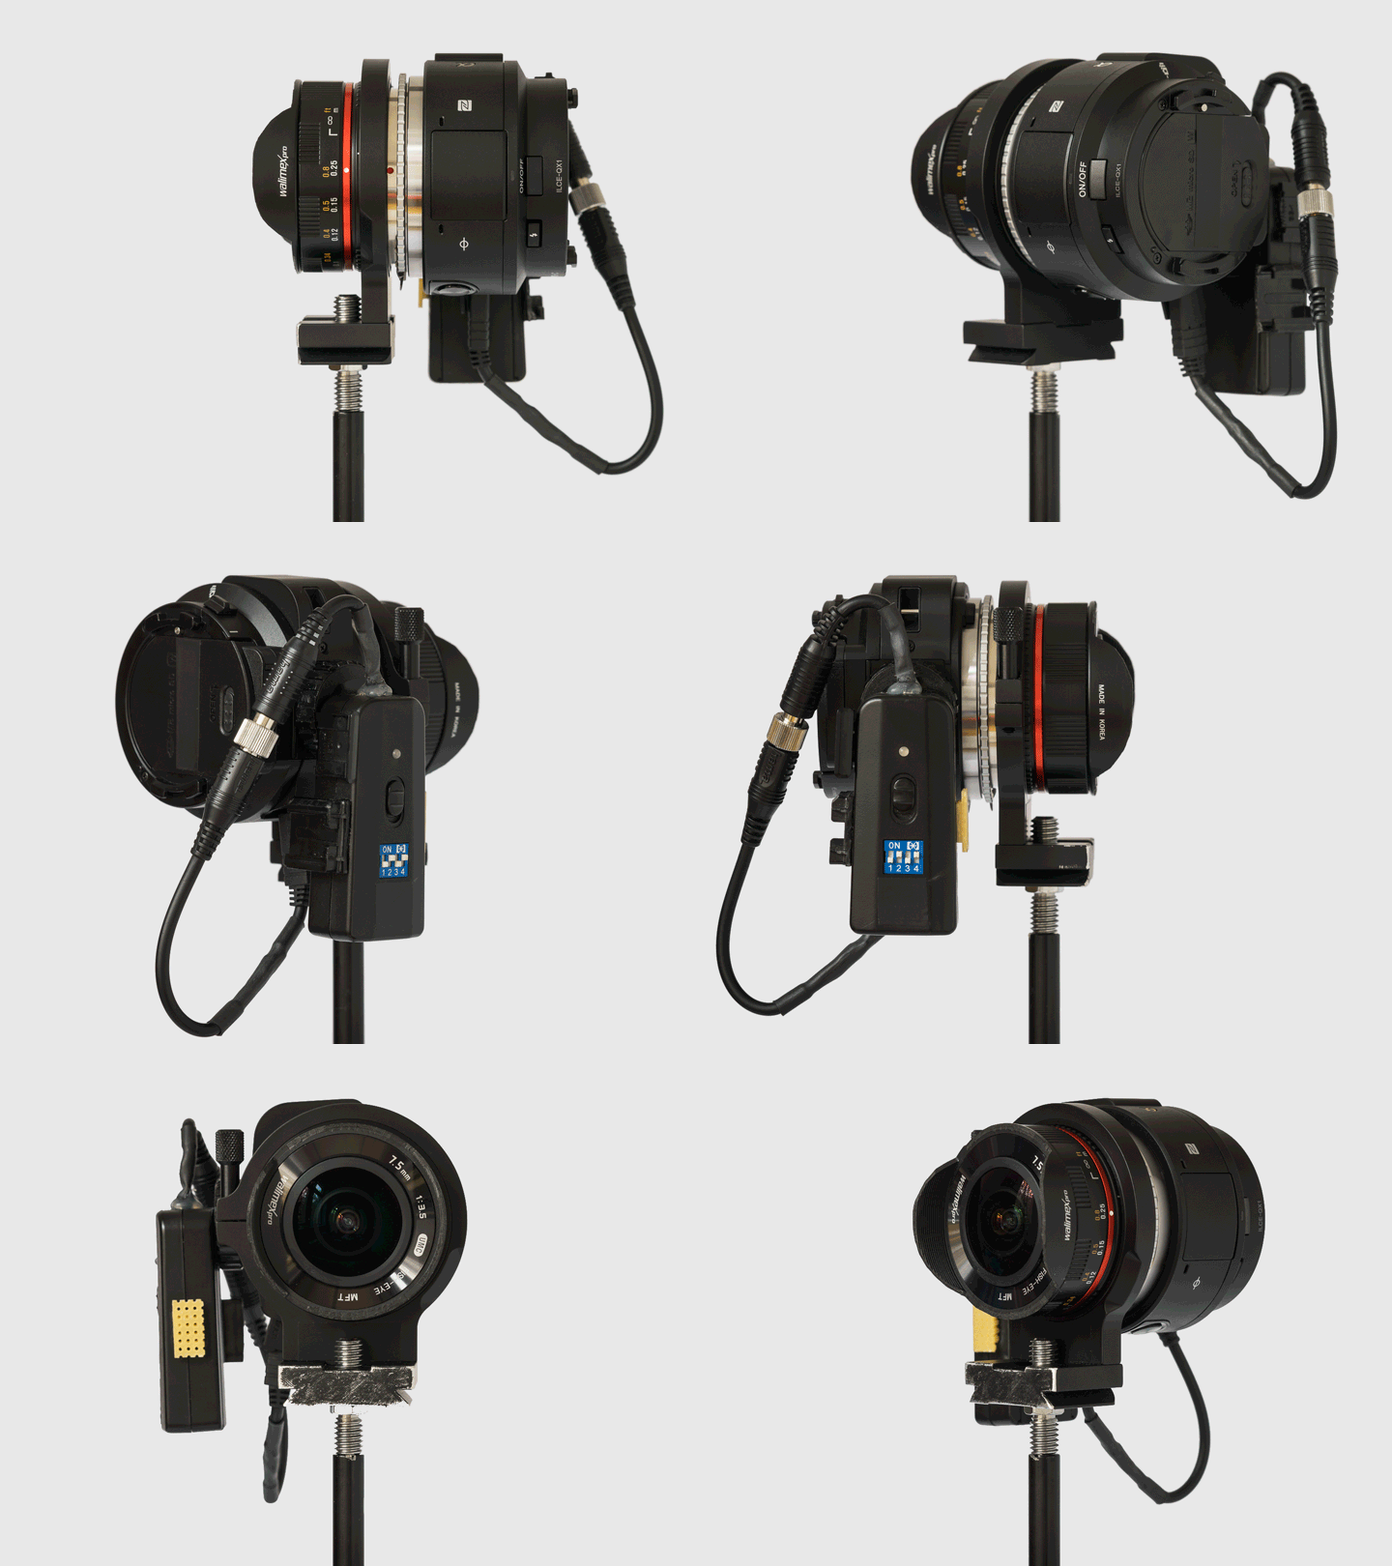
The image shows the shaved lens, the Sony ILCE-QX1 itself, a modified radio remote control and a L-bracket to mount the whole setup on a pole.
The current shooting sequence looks like this
- Check the distance scale on the lens and adjust if required (usually I only adjust if there are important objects closer than one meter from the sensor)
- Turn the camera on
- Activate WLAN and the app on the smartphone (it then connects automatically to the camera)
- Check the exposure by turning the lens in every direction
- Adjust the exposure with the app (change the shutter speed if required)
- Deactivate the app and WLAN on the smartphone (just to save battery)
- Take the images of the panorama with the radio remote control
- Put the lens cap on the lens and take an additional image (seperator image between panorama series)
- Turn the camera off
While importing the images I ignore the JPEG versions of the panorama sets and the RAW version of the seperator images.
You may find finished panoramas shot with this camera marked with the tag Sony ILCE-QX1.
How to add mandatory Photo Sphere meta data to an equirectangular image (Photoshop CC 2014)
Preface
Some information on this post is outdated! Google Views has been migrated to Google Maps / Google Streeet View. Outdated information has been
struck through.
Last year Google added a new feature to their set of web based applications. Publishing geo located spherical panoramas (aka Photo Spheres) on Views.
In another article, Markus already described the complete workflow which is needed to publish a panoramic image on Views and embed it into your website.
I already described different methods of adding mandatory Photo Sphere meta data to an equirectangular image in a second article. One of the methods described a custom meta data panel which could be used within Photoshop CS6 and Photoshop CC to read and write the photosphere meta data.
As Adobe changed their specification for creating meta data panels for Photoshop CC 2014, I redid the description…
Note for downloading the XML files
Depending on your browser it could be the best option to click the XML download link and use the context menu to save the link as XML to your local computer!
Custom photo sphere meta data panel for Photoshop CC 2014
First you have to identify the proper location for the File Panels. On a Windows system running PS CC 2014 the files are located in
C:\Users\[Username]\AppData\Roaming\Adobe\XMP\Metadata Extensions
or directly using the appropriate environment variable:
%USERPROFILE%\AppData\Roaming\Adobe\XMP\Metadata Extensions
PS CC 2014 running on Mac OS uses the following location
[Username]/Library/Application Support/Adobe/XMP/Metadata Extensions
Navigate to the location and create a sub directory named
Photosphere
with two subdirectories named
schema
and
view
Change to the newly created directory ‘Photosphere’ and create a file named
manifest.xml
with the following content (or download the file here):
<?xml version="1.0" encoding="UTF-8"?> <!-- Copyright 2014 by Jürgen Matern (/author/juergen/) This file is licensed under the Creative Commons Attribution ShareAlike 3.0 License (http://creativecommons.org/licenses/by-sa/3.0/). In short: you are free to share and make derivative works of the file under the conditions that you appropriately attribute it and that you distribute it only under a license identical to this one. Photosphere File Info Panel (manifest.xml) --> <extension xmlns="http://ns.adobe.com/metadata/extension/1.0/" name="Photosphere" version="1.0" locFilePrefix="photosphere"> </extension> |
Change to the newly created directory ‘schema’ and create a file named
photosphereSchema.xml
with the following content (or download the file here):
<?xml version="1.0" encoding="UTF-8"?> <!-- Copyright 2014 by Jürgen Matern (/author/juergen/) This file is licensed under the Creative Commons Attribution ShareAlike 3.0 License (http://creativecommons.org/licenses/by-sa/3.0/). In short: you are free to share and make derivative works of the file under the conditions that you appropriately attribute it and that you distribute it only under a license identical to this one. Photosphere File Info Panel (photosphereSchema.xml) --> <xmp_definitions> <!-- Defining the namespace and prefix of the schema --> <xmp_schema prefix='GPano' namespace='http://ns.google.com/photos/1.0/panorama/' label='Photosphere' description='Properties for Photospheres'> <!-- Defining the properties --> <xmp_property name='StitchingSoftware' category='external' type='openchoice' element_type='text' label='Stitching Software:' description='The software which created the panorama.'> <xmp_choice raw_value='PTGui Pro 10.0.10' label='PTGui Pro 10.0.10'/> <xmp_choice raw_value='PTGui 10.0.10' label='PTGui 10.0.10'/> <xmp_choice raw_value='Hugin' label='Hugin'/> </xmp_property> <xmp_property name='ProjectionType' category='external' type='closedchoice' element_type='text' label='Pano Projection:' description='Currently Google applications only support equirectangular projection.' > <xmp_choice raw_value='equirectangular' label='equirectangular'/> <xmp_choice raw_value='' label='none specified'/> </xmp_property> <xmp_property name='UsePanoramaViewer' category='external' type='boolean' label='Use Panorama Viewer:' description='Set this value if the image should show as photosphere.' /> <xmp_property name='PoseHeadingDegrees' category='external' type='real' label='Heading:' description='This field is only mandatory for Google Maps. It is the direction in the middle of the image in degrees. North=0, East=90, South=180, West=270. See [GPS].' /> <xmp_property name='CroppedAreaImageWidthPixels' category='external' type='integer' label='Cropped Area Image Width:' description='For full spheres the same as Full Pano Width and width of the image in pixels (see [Image Size] further down).'/> <xmp_property name='CroppedAreaImageHeightPixels' category='external' type='integer' label='Cropped Image Heigth:' description='For full spheres the same as Full Pano heigth and height of the image in pixels (see [Image Size] further down).'/> <xmp_property name='FullPanoWidthPixels' category='external' type='integer' label='Full Pano Width:' description='For full spheres this equals to the height of the image in pixels (see [Image Size] further down).'/> <xmp_property name='FullPanoHeightPixels' category='external' type='integer' label='Full Pano Heigth:' description='For full spheres this equals to the height of the image in pixels (see [Image Size] further down).'/> <xmp_property name='CroppedAreaLeftPixels' category='external' type='integer' label='Cropped Pixels Left:' description='Set to 0 for full spheres.'/> <xmp_property name='CroppedAreaTopPixels' category='external' type='integer' label='Cropped Pixels Top:' description='Set to 0 for full spheres.'/> <xmp_property name='SourcePhotosCount' category='external' type='integer' label='Source Photos Count:' description='Number of source image. This value is optional.'/> <xmp_property name='FirstPhotoDate' category='external' type='date' label='First Photo Date' description='Date and time of the first image taken. This value is optional.'/> <xmp_property name='LastPhotoDate' category='external' type='date' label='Last Photo Date' description='Date and time of the last image taken. This value is optional.'/> </xmp_schema> </xmp_definitions> |
Change to the newly created directory ‘view’ and create a file named
photosphereView.xml
with the following content (or download the file here):
<?xml version="1.0" encoding="UTF-8"?> <!-- Copyright 2014 by Jürgen Matern (/author/juergen/) This file is licensed under the Creative Commons Attribution ShareAlike 3.0 License (http://creativecommons.org/licenses/by-sa/3.0/). In short: you are free to share and make derivative works of the file under the conditions that you appropriately attribute it and that you distribute it only under a license identical to this one. Photosphere File Info Panel (photosphereView.xml) --> <views xmlns="http://ns.adobe.com/metadata/ui/1.0/"> <view xmlns:exif="http://ns.adobe.com/exif/1.0/" xmlns:GPano='http://ns.google.com/photos/1.0/panorama/' name="Photosphere" label="Photosphere" description="This view shows the GPano properties and some other values from the EXIF metadata."> <section label="Photosphere" type="labelled"> <property name='GPano:StitchingSoftware' /> <property name='GPano:ProjectionType' /> <property name='GPano:UsePanoramaViewer' /> <property name='GPano:PoseHeadingDegrees' /> <property name='GPano:CroppedAreaImageWidthPixels' /> <property name='GPano:CroppedAreaImageHeightPixels' /> <property name='GPano:FullPanoWidthPixels' /> <property name='GPano:FullPanoHeightPixels' /> <property name='GPano:CroppedAreaLeftPixels' /> <property name='GPano:CroppedAreaTopPixels' /> <property name='GPano:SourcePhotosCount' /> <property name='GPano:FirstPhotoDate' /> <property name='GPano:LastPhotoDate' /> </section> <section label="Image Size" type="labelled"> <property name="exif:PixelXDimension"/> <property name="exif:PixelYDimension"/> </section> <section label="GPS" type="labelled"> <property name='exif:GPSLongitude' /> <property name='exif:GPSLatitude' /> <property name='exif:GPSAltitude' /> <property name='exif:GPSImgDirection' /> <property name='exif:GPSDestLongitude' /> <property name='exif:GPSDestLatitude' /> </section> </view> </views> |
The properties ‘SourcePhotosCount’, ‘FirstPhotoDate’ and ‘LastPhotoDate’ are optional values for a photosphere.
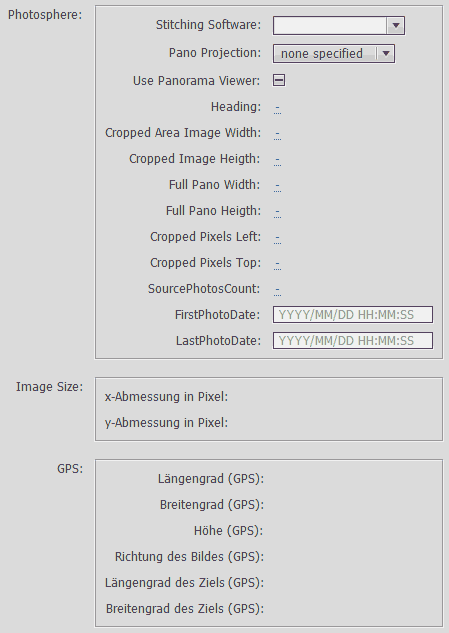
Then open the file info dialog of Photoshop CC 2014. When all the meta data is missing, the new panel looks like this on a german installation:
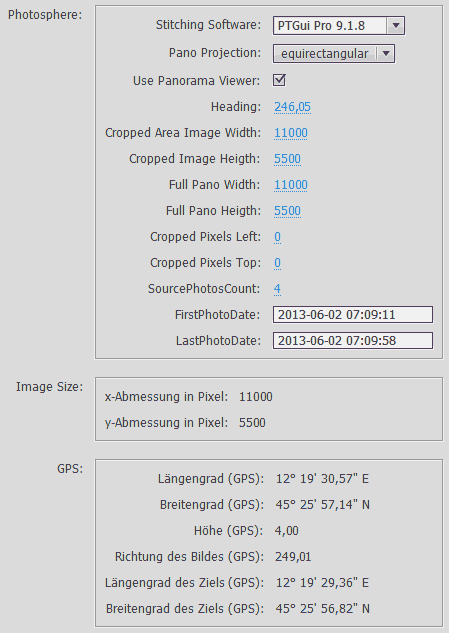
And the following screenshot shows the panel, when the meta data fields are already populated.
Mounting the Walimex 8mm Fish Eye with the Novoflex ASTAT-NEX
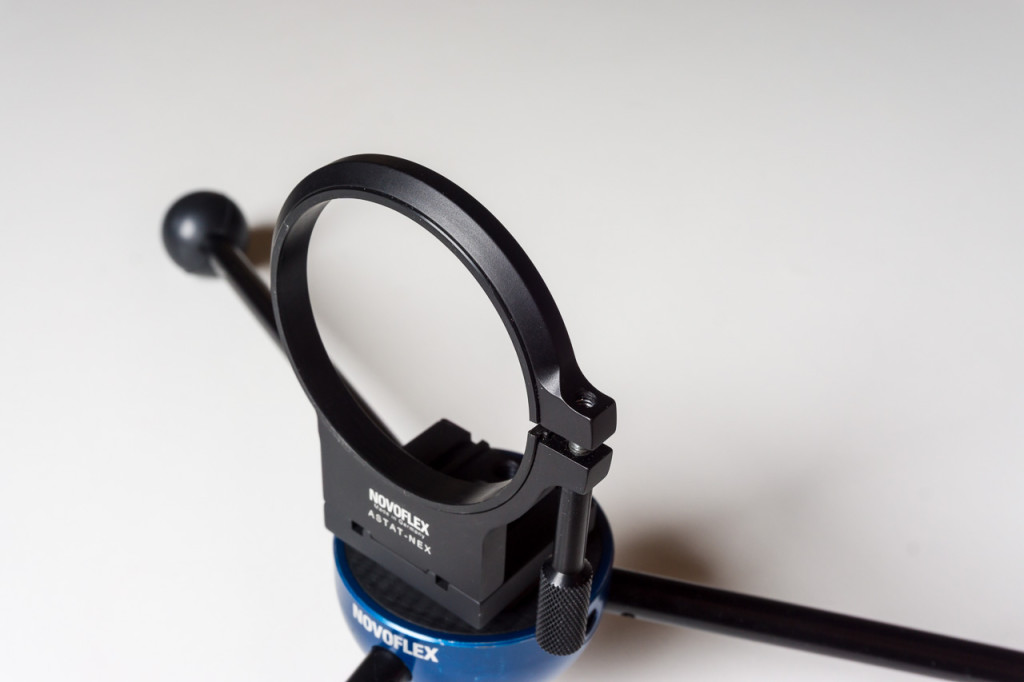
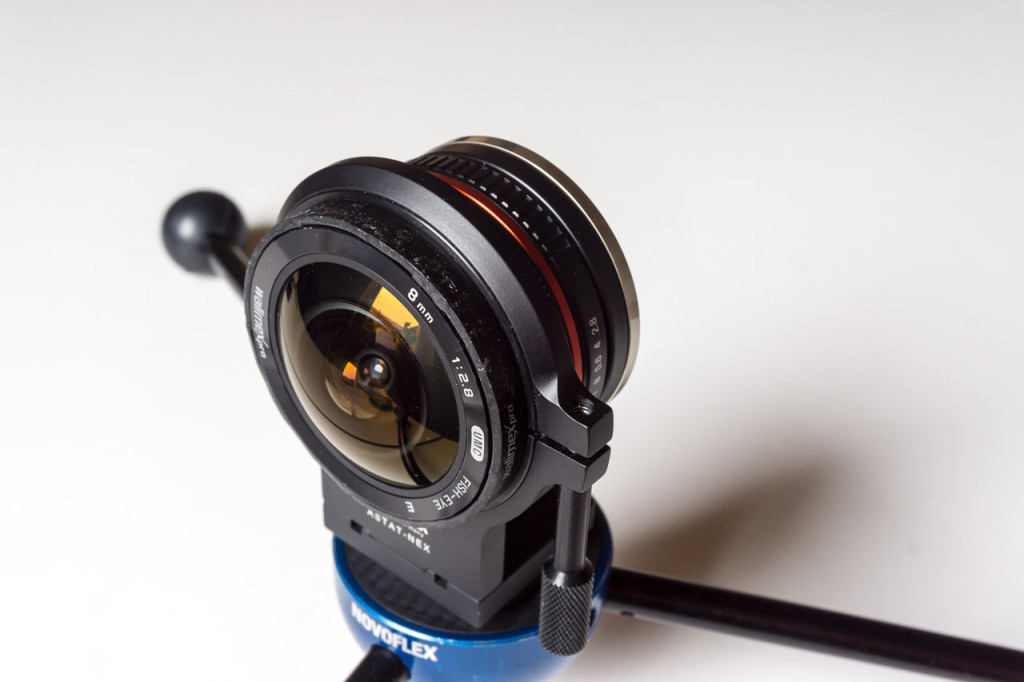
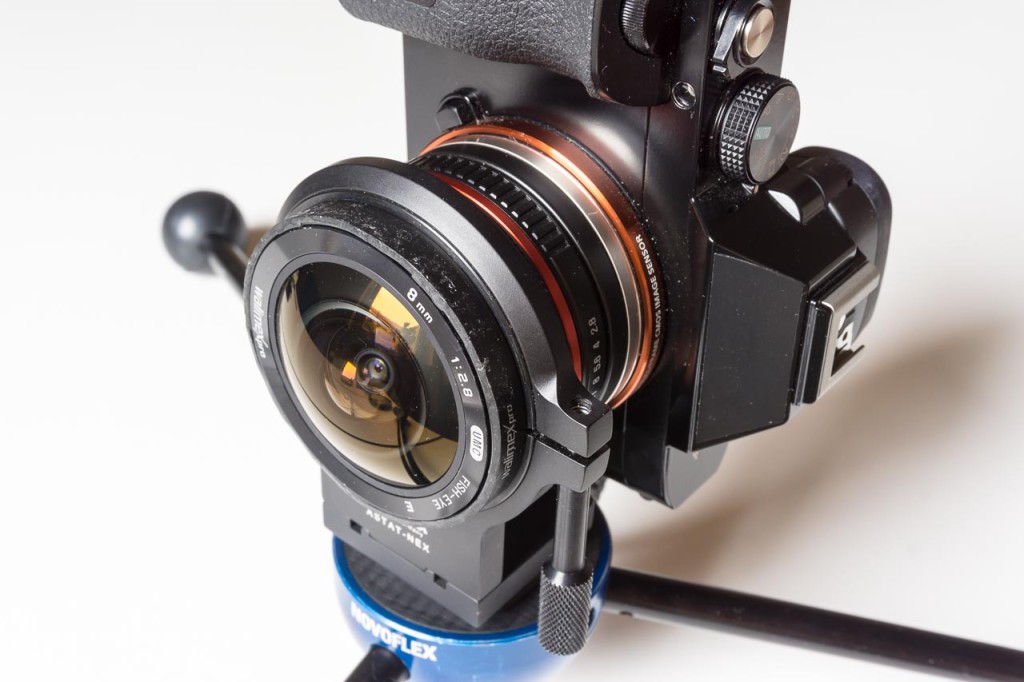
The Novoflex ASTAT-NEX is usually used to mount any of the different Novoflex adapters to a tripod. However the diameter of the ring fits the Walimex 8mm perfectly. The following images illustrate the mounting with the Sony ILCE-7. I only made a small change to the ASTAT-NEX adapter: I removed a little piece using a hand saw to improve the mounting options. With the small part sawed off I can mount the lens both ways round. Both options allow it to change the aperture and the distance on the lens! Depending on my setup (pole, high pole or table top) I use one or the other option.
I called the first option Reverse in the image series below.
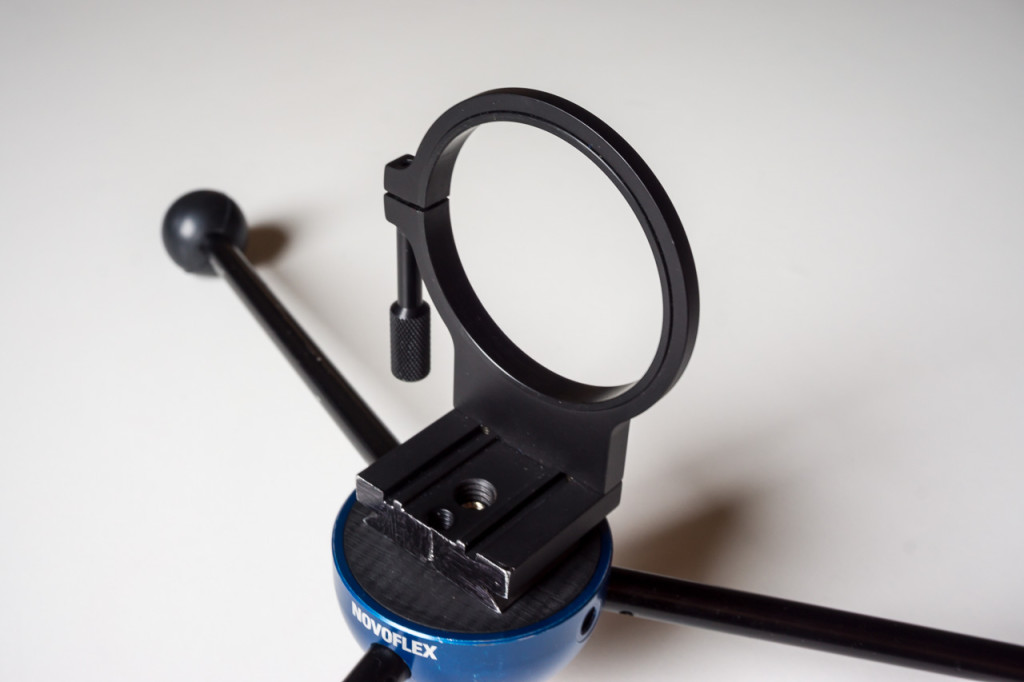
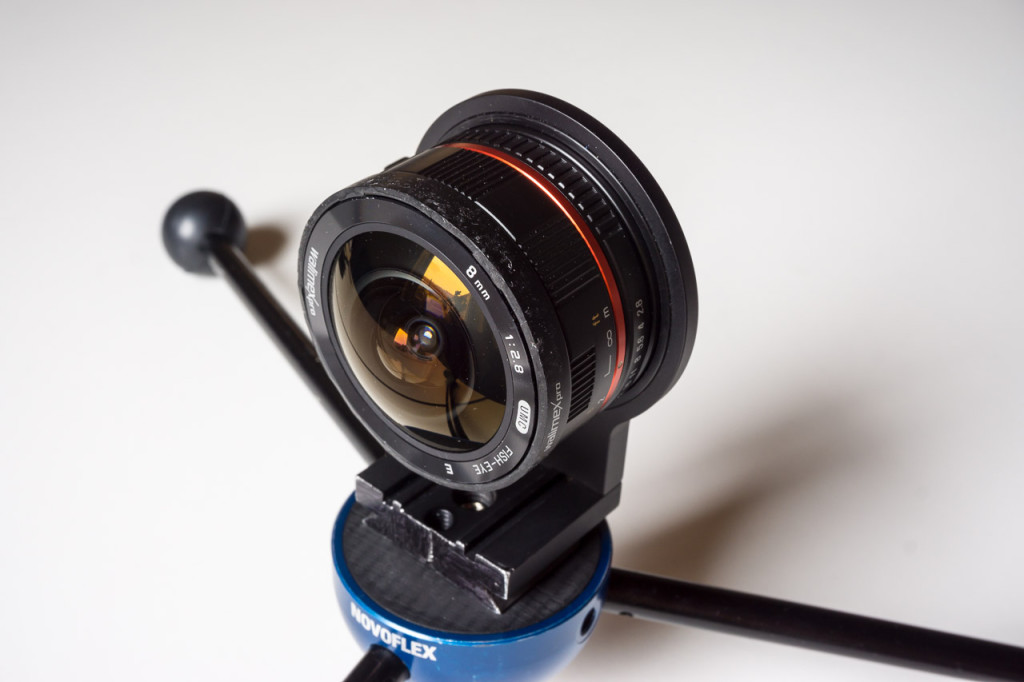
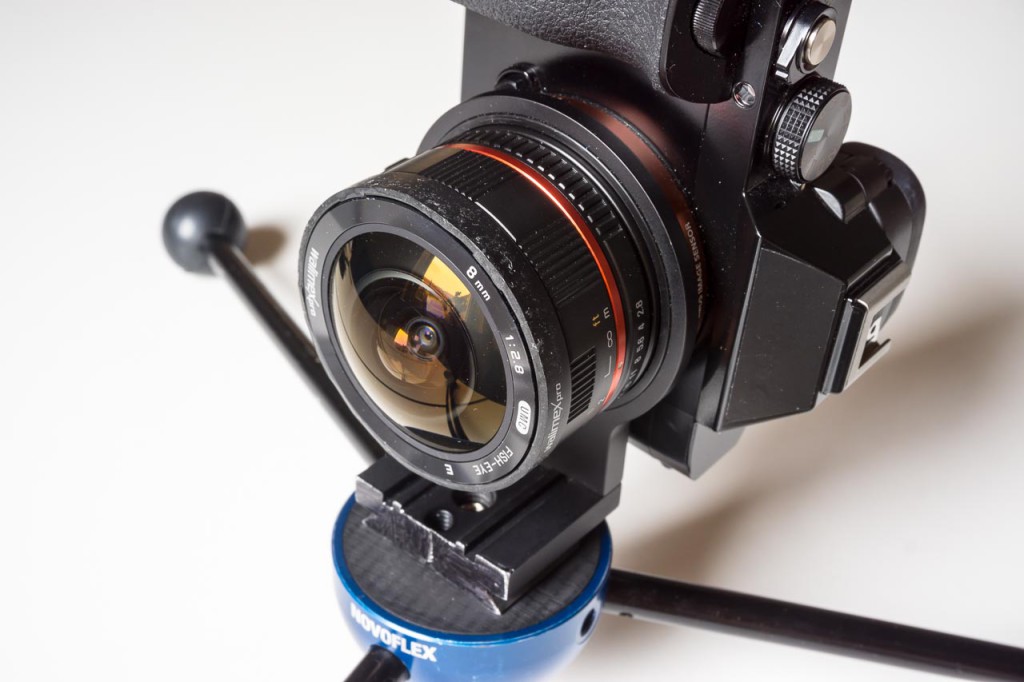
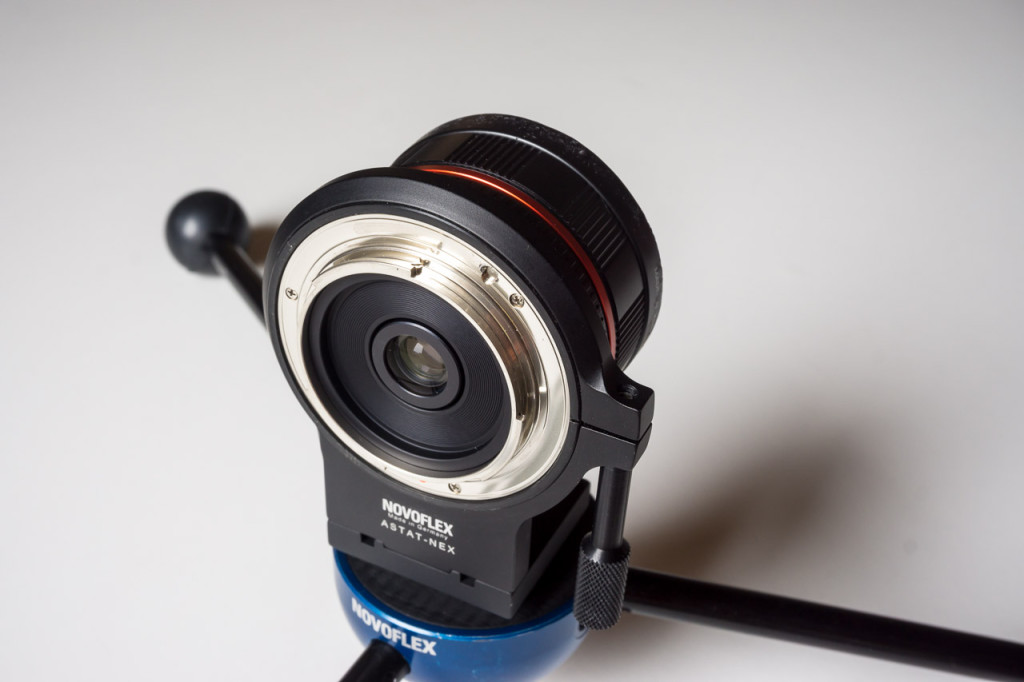
The following images show the normal mounting option you can use when you do not want to saw a small part from your ASTAT-NEX adapter.
Comparing a Mercator projection with a Cube Face projection
One of my favorite panoramas I shot recently is the atrium of the Bavarian Ministry of Justice. Why? Because I managed to capture the almost perfect symmetry in the room. See for yourself here or here. I also reprojected the full spherical panorama to the Mercator view you see in the following image.

What I don’t like about this panorama are the curved lines. It came to my mind that a rectilinear reprojection of the image would result in straight lines. However it is also not possible to reproject the full 360° field of view into one single rectilinear image. But it is possible to split the full 360° into 4×90°. The following image is the result of this technique.

All the straight lines in the panorama are also straight in the real building. The problem is now you get some discontinuities at border between the four cube faces. This is not a real problem in this panorama as the floor tiles just look fine wih the additional discontinuities.
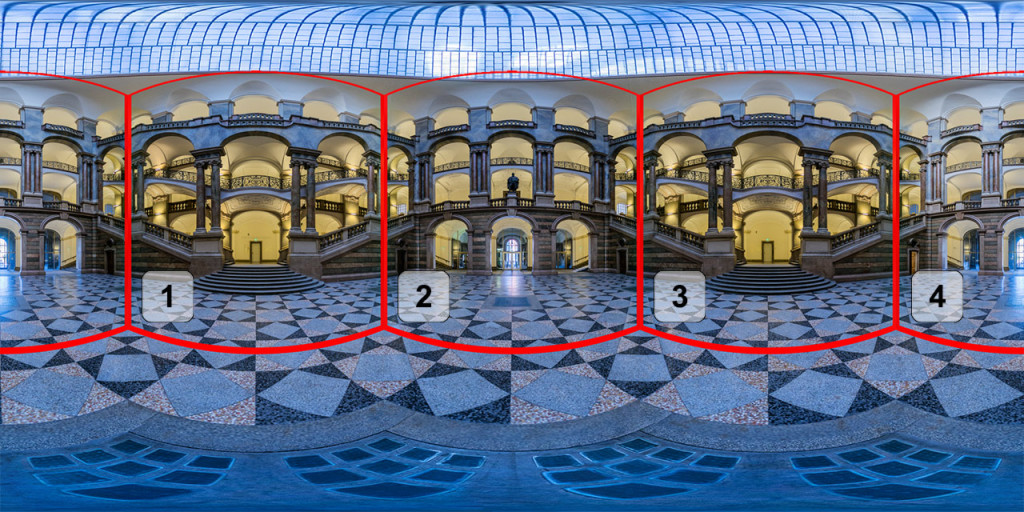
The following image shows the four cube faces reprojected back onto the equirectangular image. You can see here clearly why the floor tiles are not curved in the final Cube Face Panorama. You can also see that the cube faces are not really cube faces, because I moved the individual cubes faces towards the zenith to see less of the floor and more of the ceiling.
The following panorama shows the extracted cube faces in an interactive view:
[pano file=”https://www.panotwins.de/wp-content/panos/MMatern_20140107_1741_Justizpalast_Halle_CubeFaces_MakingOf.xml” preview=”https://www.panotwins.de/wp-content/panos/MMatern_20140107_1741_Justizpalast_Halle_CubeFaces_MakingOf.jpg”]
Barnafoss Bridge Downstream (Making Of)
Recently I got a question about this panorama I published on Maps Views:
- Hi Markus, nice shot, but what happen with the focus, the right of the river is blurred?
Here I try to explain the problem. In short: I’ve just been too lazy to make an “up” shot (zenith). It is completely missing. The stitching result has not been retouched at all.
When making a horizontal pole shot the “zenith” and “nadir” end up near the equator of the photo sphere. You can see this clearly in the image below, where the red image borders cross. “Zenith” and “nadir” in this case means the direction where the pole is pointing!
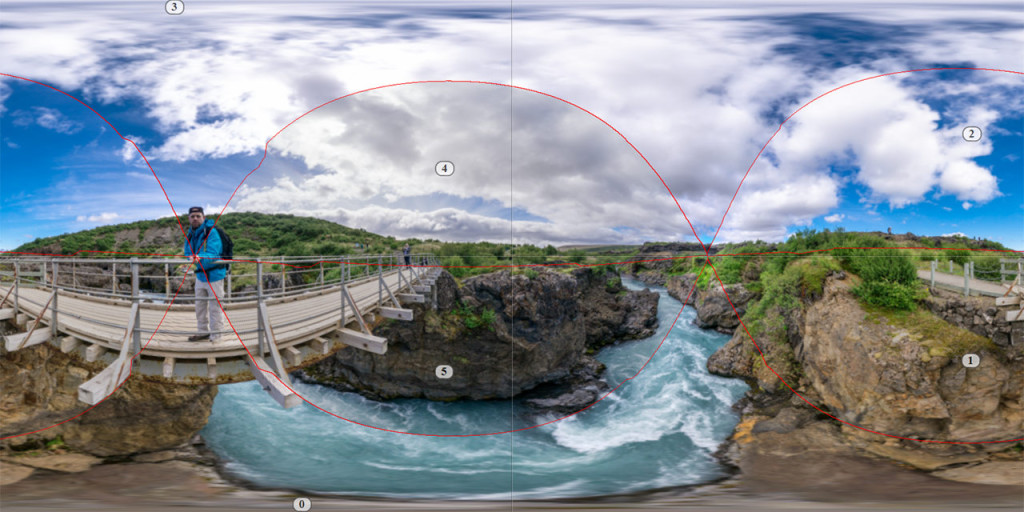
When removing all images but one, this looks like the image below. You can clearly see, that the worst part of the fish eye lens ends up in an area of interest. In this case the right side of the river bank.
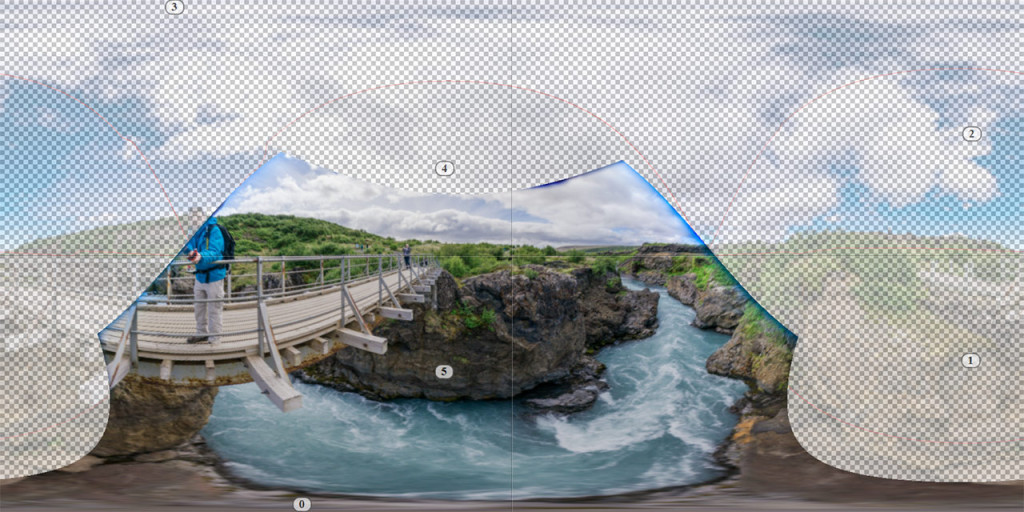
This image shows the original fish eye shot. You see the bad part of the lens ending up on the right hand side of the river bank.
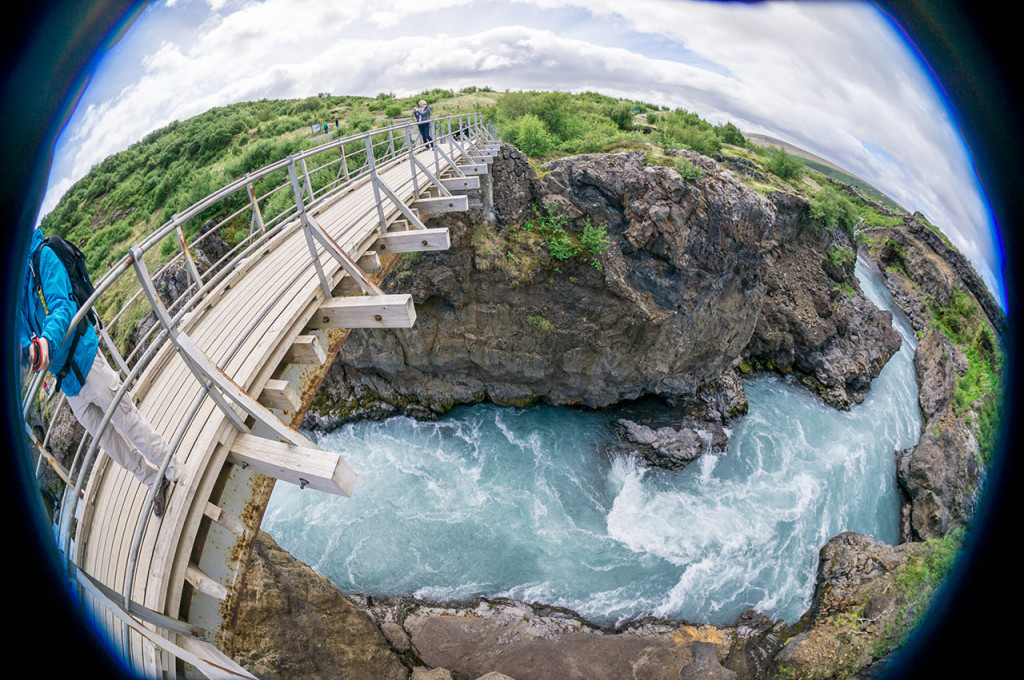
The solution to this problem is easy: You just need to take an “up” shot. However in this case “up” is again in the direction of the pole! Unfortunately for minimizing the parallax problems I would have needed a different mounting option for my camera.
Comparing image crops of Sony LA-EA2 and Sony LA-EA4 on Sony ILCE-7 (with Sony SAL70200G @ 200mm)
Today I did some tests with the two lens adapters Sony LA-EA2 and Sony LA-EA4, which can be used to adapt a lens with a Sony A-mount to a camera with an Sony E-mount. In another article I already compared looks and weigth of the two adapters. In this article I focus on the different image crops when you use the two adapters on a full frame camera with E-mount. I used a Sony ILCE-7 for my tests. On a Sony ILCE-7r the crops are the same, but you get a higher pixel count.
I only tested the Sony 70-200/2.8 (SAL70200G) at 200mm. I used the lens collar of the lens to attach it to a tripod. The lens, the tripod and the subject were not moved after that.
The first image shows the result when using the LA-EA4. The resulting image is the full resolution of the sensor.
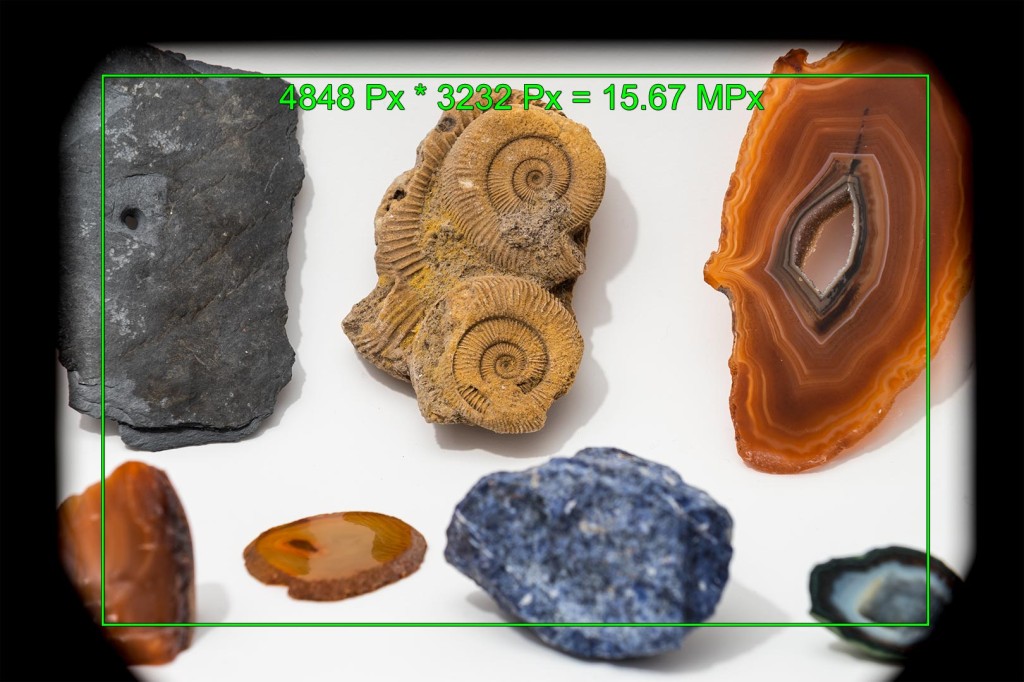
For the second image I only exchanged the LA-EA4 with the older LA-EA2. For this image I used the following configuration of the camera: Menu → Custom Settings (gear icon) → 5 → APS-C Size Capture → Off. You can clearly see the shading of the LA-EA2 on the sensor. The maximum manual crop is marked with the green rectangle.
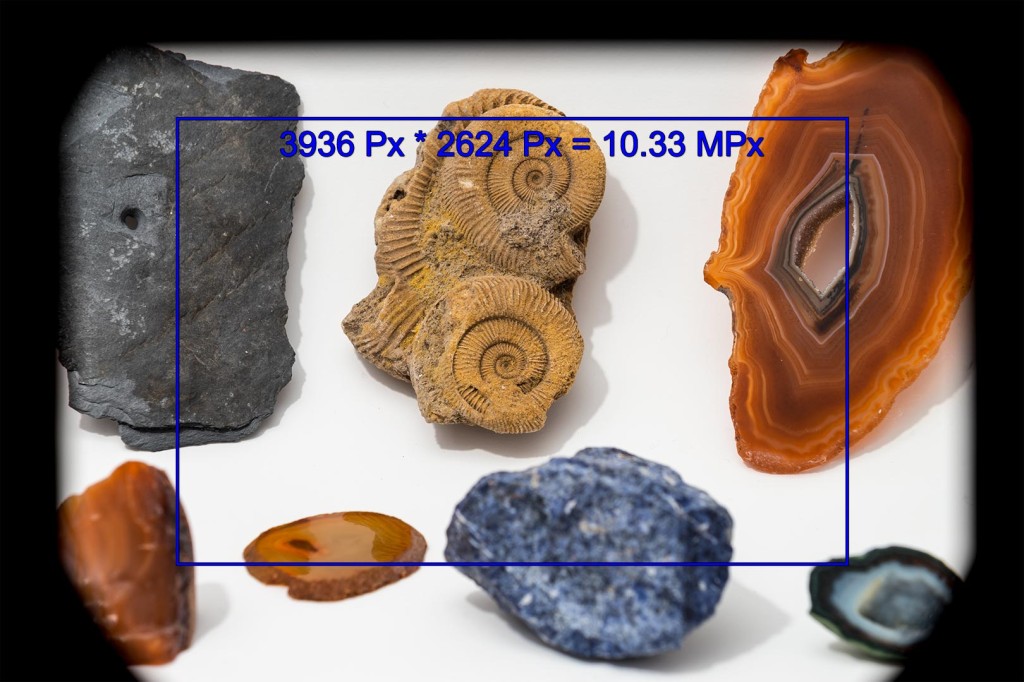
For the next image I only changed one setting in the camera: Menu → Custom Settings (gear icon) → 5 → APS-C Size Capture → On. The resulting image showed an even larger crop than the second image but no shading of the adapter. In postprocessing I superpositioned the two images to be able to mark the camera crop in the second image. This is the result.
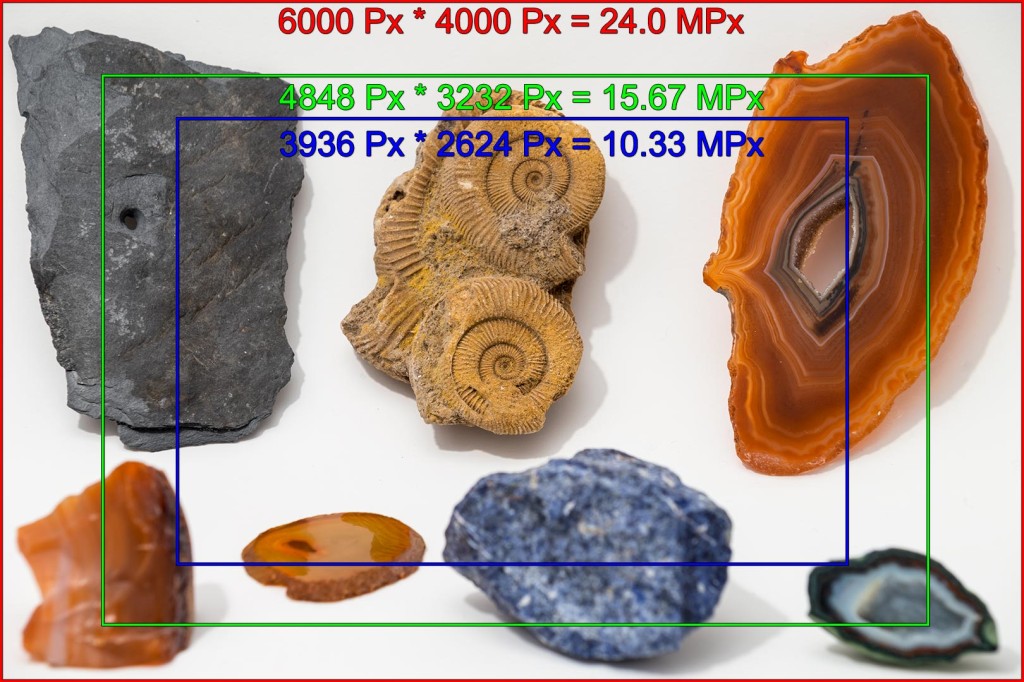
In the last image I used the first taken picture and marked the three different crops. The red marker is the LA-EA4, the green marker is the LA-EA2 with maximum manual crop and the blue marker is LA-EA2 with cropping enabled in camera.
The maximum manual crop (which is equivalent to the unshaded area of the sensor) will differ when you use a different lens. And it also differs with different focal lengths of a zoom lens. But this needs some more testing.
Images of shaved Samyang (Bower, Rokinon, Walimex) 8mm fisheye lens attached to Sony A7 (ILCE-7)
In the last article I showed the resulting images on the sensor at the different stages of shaving the Samyang (Bower, Rokinon, Walimex) 8mm/2.8 UMC fisheye lens.
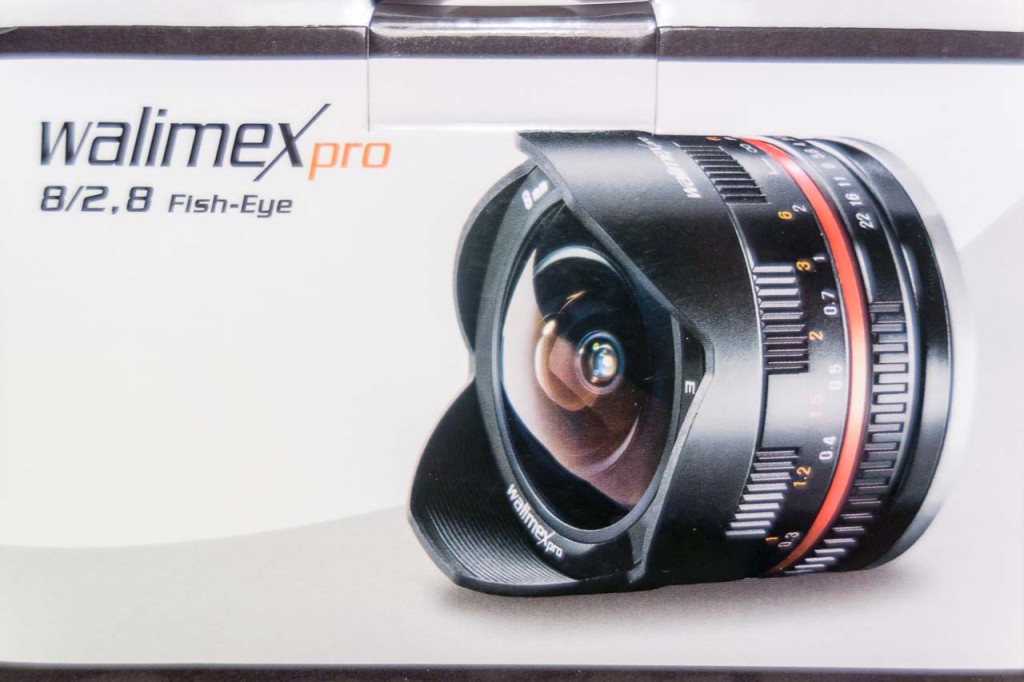
The following picture shows one side of the box of the Walimex version of the lens. It also shows the lens hood in its original state.
The following images show the lens with already shaved lens hood.
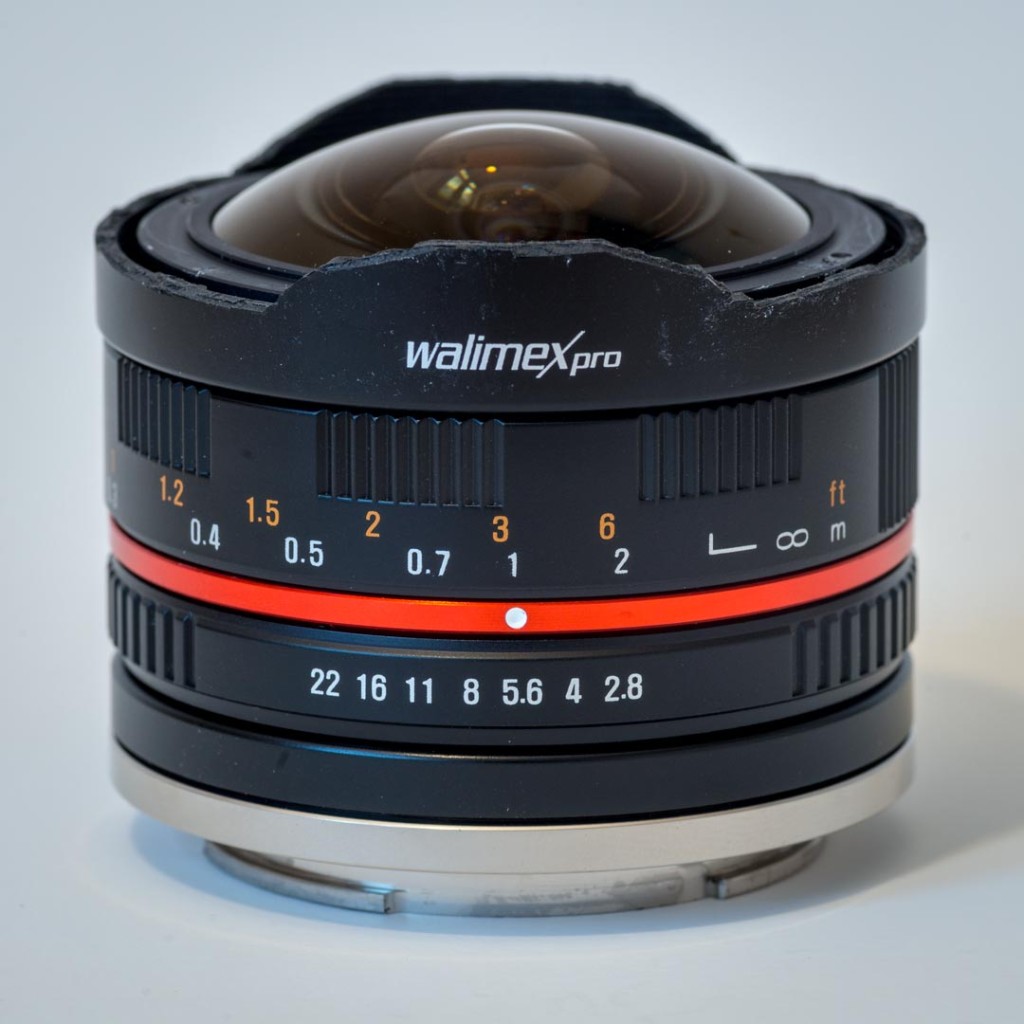
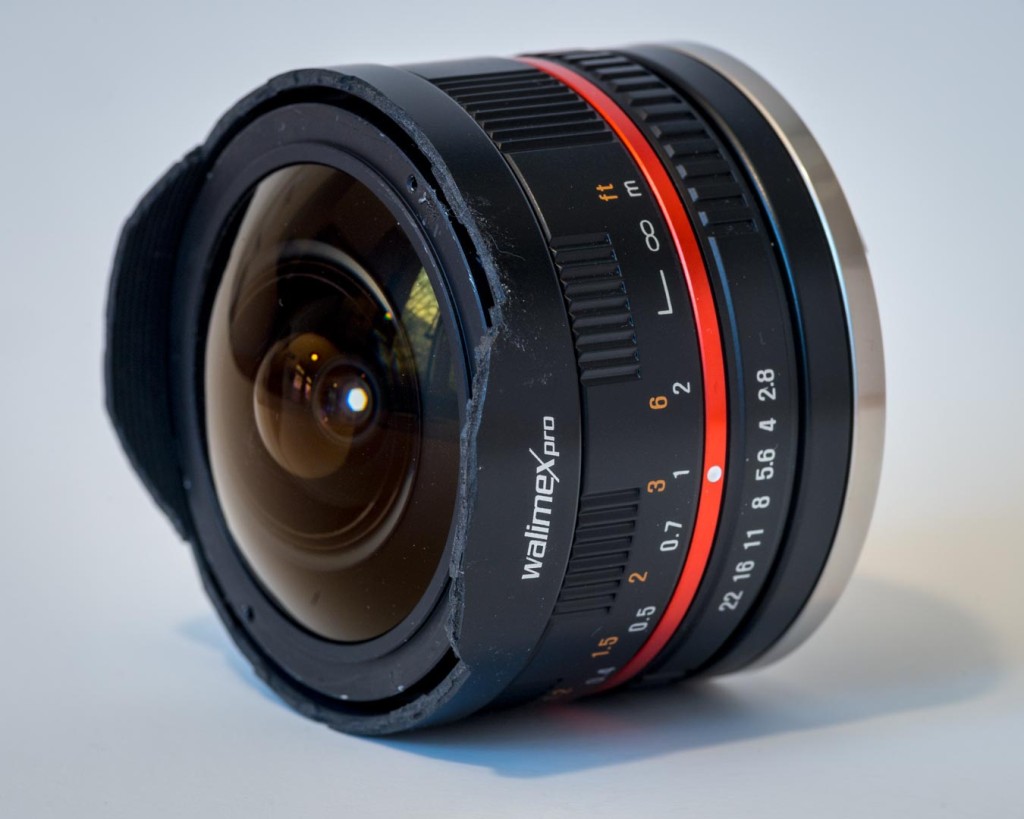
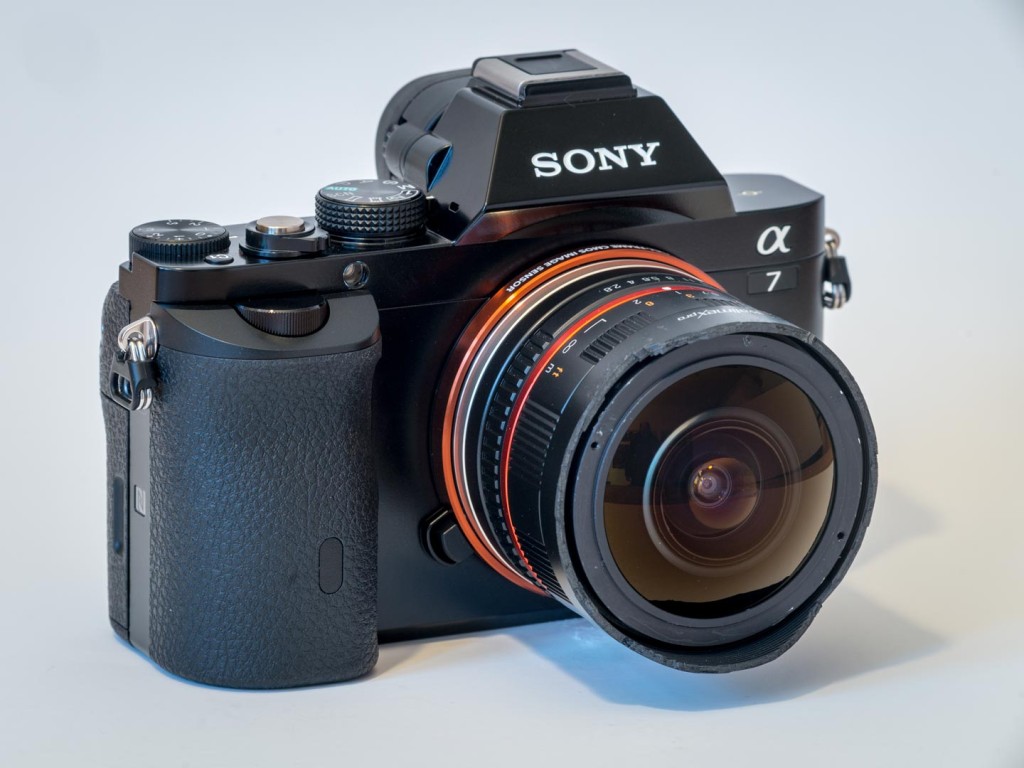
The last image shows the lens attached to a Sony ILCE-7.
Shaving the lens hood of the Samyang (Bower, Rokinon, Walimex) 8mm fisheye lens for usage on the Sony E-mount with full-frame sensors
The Samyang 8mm/2.8 UMC II fisheye lens is available for several camera mounts (Canon M, Fujifilm X, Samsung NX and Sony E). It is designed as a full frame fisheye which covers 180° from corner to corner on these aforementioned mounts with their respective sensor sizes. But since the introduction of the Sony cameras with E-mount and full frame sensor there is an interesting new option for panoramic photographers.
In all the featured examples of this post I just took a picture of a white piece of paper bended around the lens which I converted to a black and white image afterwards.
If you mount the lens in its original state on a Sony ILCE-7 (or ILCE-7r) then you get an image which looks something like this.
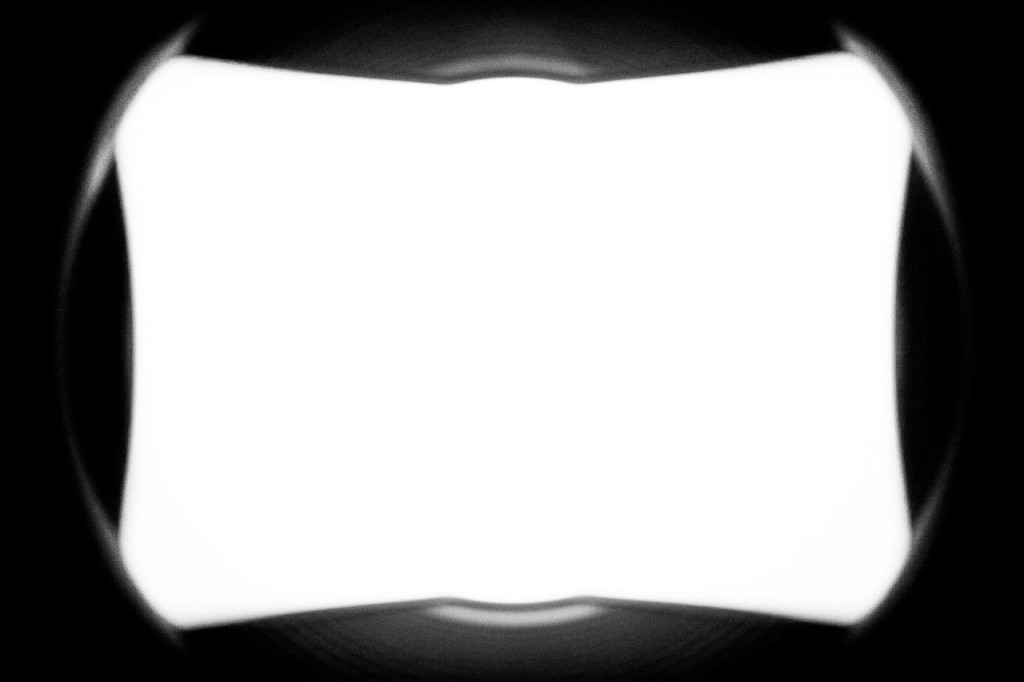
You can clearly see, that the lens hood shades a good part of the image. Which is of course a bad thing if we want to shoot a spherical with this lens.
In the next example I therefore used a side cutter to remove the plastic lens hood on the longer side of the sensor.
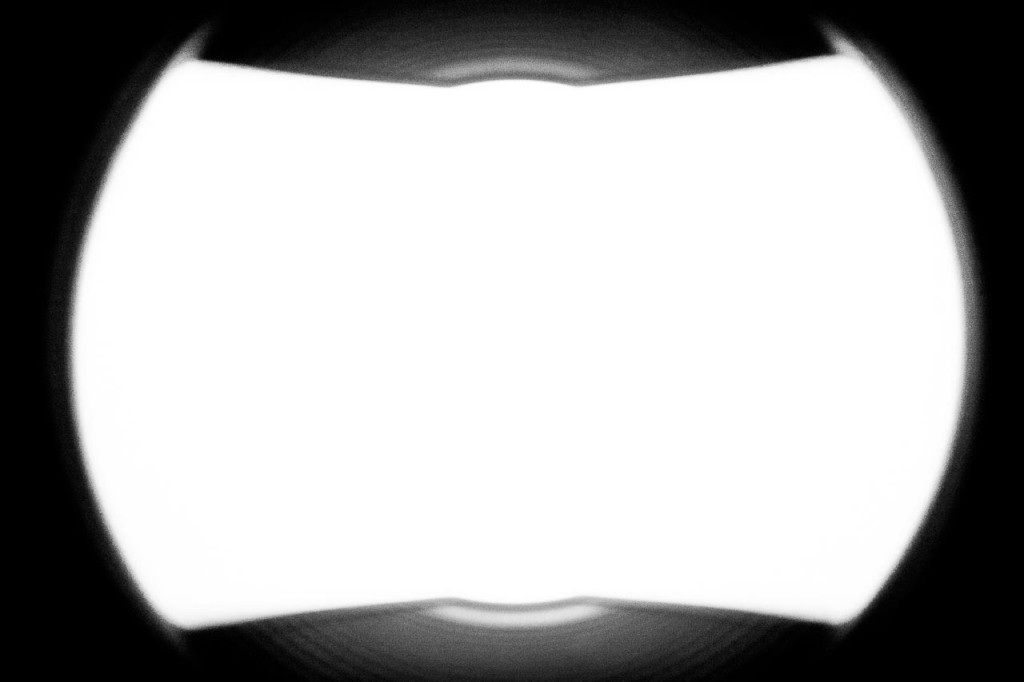
And in the final example I removed as much of the lens hood as I could. This is the final resulting image.
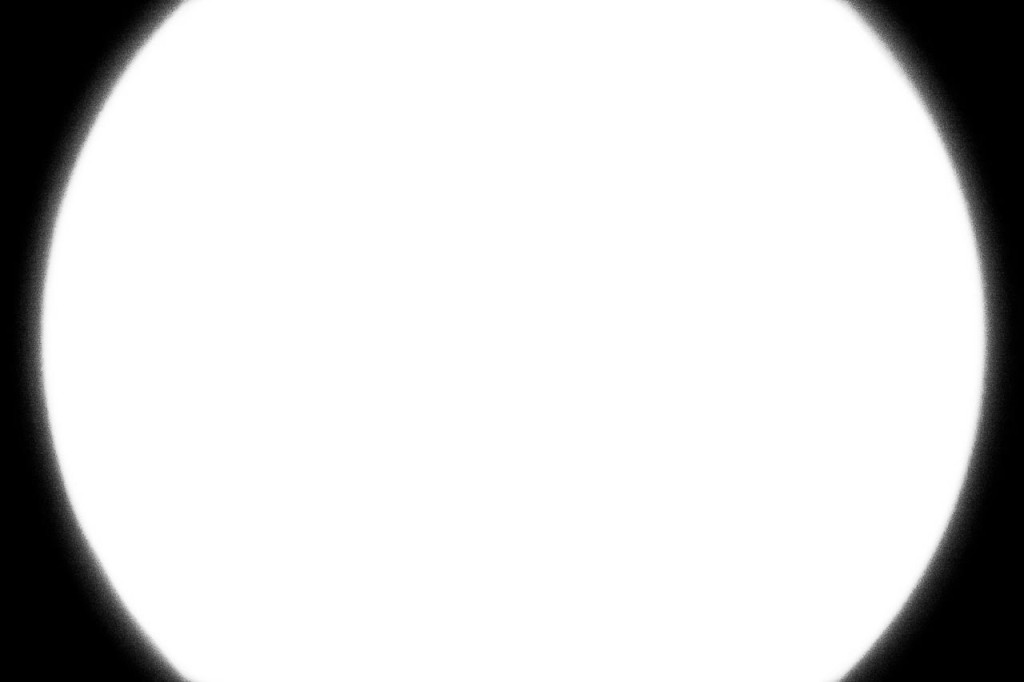
In this state the lens covers approximately 190° on the long side of the sensor. With three or four images easily covering the full sphere the final equirectangular is 10000 pixels by 5000 pixels in size on a Sony ILCE-7.
You can already find a daylight, blue hour and indoor example from Markus which were all shot with a shaved version of the lens and a Sony ILCE-7.
Additional remark
The shown images were produced with an Samyang 8mm/2.8 UMC II fisheye lens on a SONY ILCE camera with a full frame sensor. You can gat a nearly identical result if you use the Samyang 7mm/3.5 UMC fisheye lens with a SONY ILCE camera with APS-C sized sensor and an micro 4/3 to E-mount adapter.
